使用 Travis CI 来部署 Jekyll 到 AWS S3 上

开始

Travis CI 是一个非常好的工具来帮助你自动检测和自动部署。

你可以使用你的 Github 账号来登录 Travis CI。 https://travis-ci.org/ 是适合于公开的库, https://travis-ci.com/ 是适用于私有的库。如果你想部署私有的库,Travis CI 会向你额外收取一定的费用。

设置库

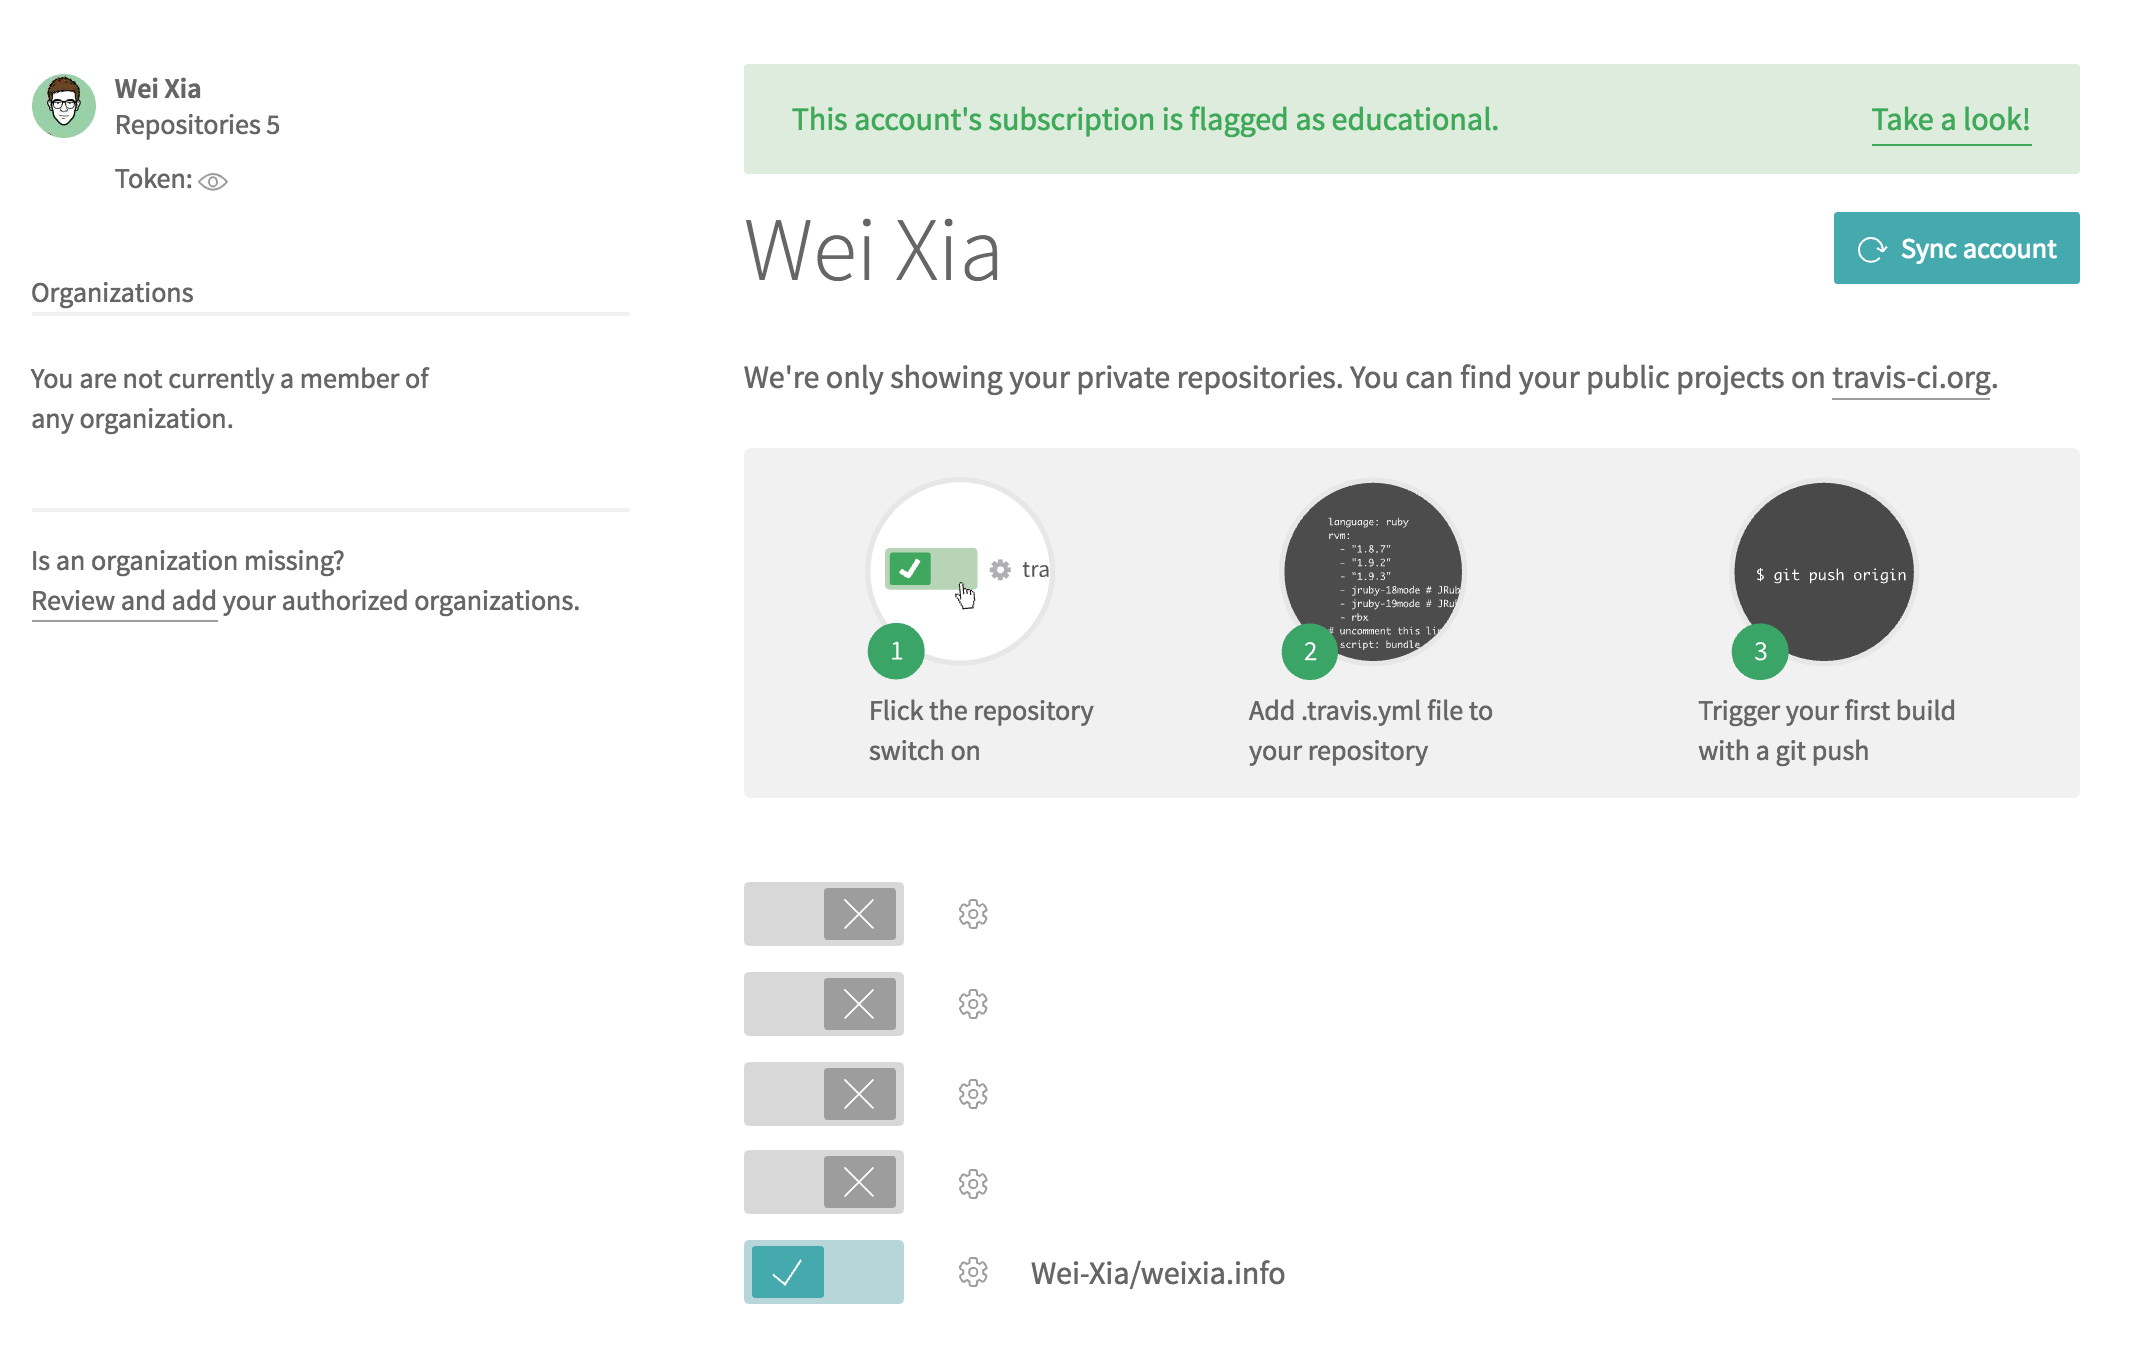
登录你的 Github 账号,然后选择包含 Jekyll 网站的库。如下图所示: setup
脚本设置

Travis

Travis CI 需要 .travis.yml 文件来支持和部署网站,你需要将此文件建立下文件夹的根目录。

如下所示就是我使用的代码:

1
2
3
4
5
6
language: ruby
rvm:
- 2.1
install: gem install jekyll -v 2.4.0 && gem install s3_website
script: jekyll build
after_success: s3_website push
  • install: gem install jekyll -v 2.4.0 && gem install s3_website 是用来安装 jekylls3_website
  • s3_website 能帮助你将文件上传到 AWS S3 上。
  • script: jekyll build 是用 Jekyll 来建立这个网站。
  • after_success: s3_website push 将建立网站的所有文件上传到 AQS S3 上。

AWS S3

s3_website 需要一个配置来获取你 Amazon Web Service 的账户权限。 在文件夹的根目录,简单地创建一个 s3_website.yml 的文件,然后把如下的代码复制进去,别忘记修改相关变量。

1
2
3
4
s3_id: fdsahfkjhaskjfhdas
s3_secret: fjsdafjashfkjdas
s3_bucket: weixia.info
cloudfront_distribution_id: fdsahjfkadhs

Environment Variables (环境变量)

这是设置 Travis CI 的最后一步,稍微修改下环境变量。

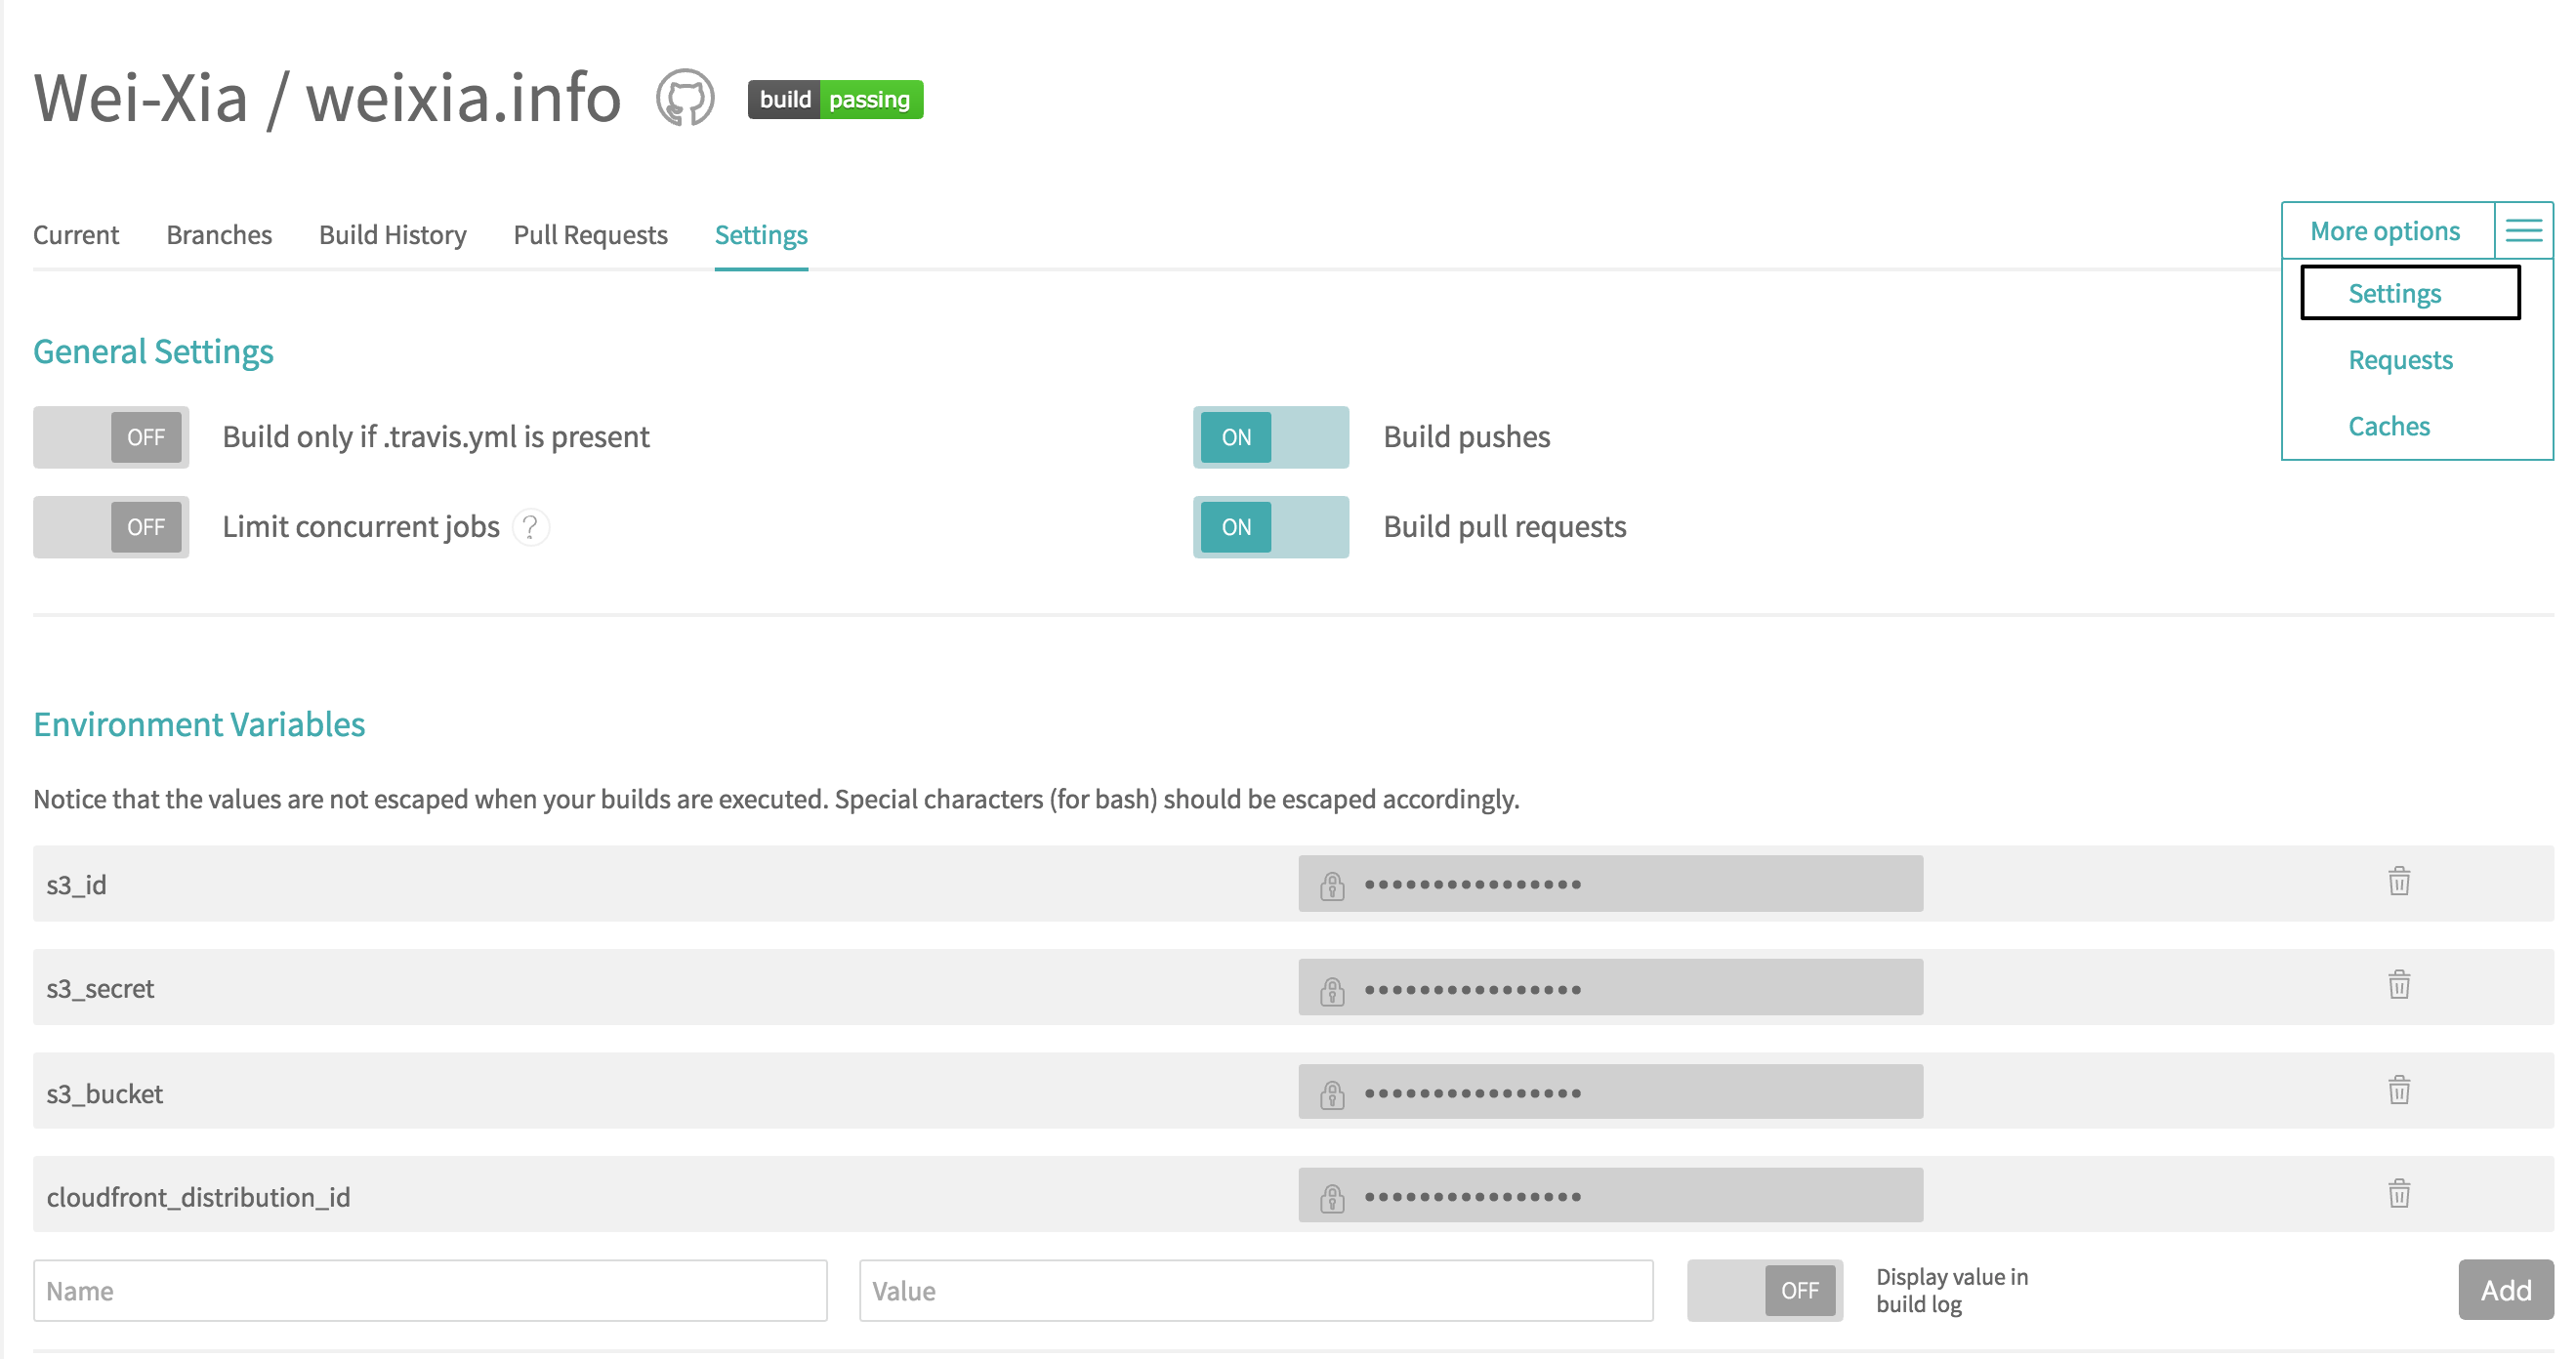
在 Travis CI 上打开所选库的页面, 选择 Environment Variables 部分, 添加 s3_ids3_secrets3_bucketcloudfront_distribution_id 的名称,同时添加上它们的值。
variables

让它运行

每当你的这个库有任何修改时,在你提交到 Github 之后, Travis CI 就会自动运行,自动部署你的网站,不需要你的任何手动操作。


本文完

Best Way To Merge A Git Branch Into Master

Question:

There are two branches, master and develop. What is the best and safest way merge develop branch into master branch?

Answer:

Here is the solution. After you commit everything in develop branch.

Do as following steps:

1
2
3
4
git checkout master
git pull origin master
git merge develop
git push origin master

As other answers mentioned, this solution is only acceptable for a small project, like only few branches, and other people won’t make changes in master branch. From my personal perspective, if there are some conflicts between master and develop branch, this might not be a good way to solve this problem.

Reference

Best (and safest) way to merge a git branch into master


This is the end of post

如何用最好的方式将一个分支合并到 Master 上

问题:

在一个 git 上有两个分支, masterdevelop. 如何用最好而且最安全的方法,把 develop 分支合并到 master 分支上?

答案:

这是一个相当简单的解决方法,当你在 develop 分支上提交了所有的修改后。

跟着这几步做:

1
2
3
4
git checkout master
git pull origin master
git merge develop
git push origin master

正如其他答案所提及的,这个解决方法只适合一些小的项目,比如就只有少数几个分支,别人不会在 master 做改变之类的。

从我个人的观点来说,如果在 masterdevelop 分支上有一个冲突,这并不是一个很好的解决方案,我们需要寻求更好的方法来解决不同分支上的冲突。

参考

Best (and safest) way to merge a git branch into master


本文完

Git操作手札

Git 是什么?

请参考 Git 在维基百科上的定义。

Git 命令

创建与修改

复制一个已创建的仓库:

1
$ git clone ssh://user@domain.com/repo.git

创建一个新的本地仓库:

1
$ git init

本地修改

显示路径下已修改的文件:

1
$ git status

显示与上次提交版本文件的不同:

1
$ git diff

把当前所有修改添加到下次提交中:

1
$ git add

把对某个文件的修改添加到下次提交中:

1
$ git add -p <file>

提交本地的所有修改:

1
$ git commit -a

提交之前已标记的变化:

1
$ git commit

附加消息提交:

1
$ git commit -m 'message here'

搜索

从当前目录的所有文件中查找 “Hello” 内容:

1
$ git grep "Hello"

历史记录

显示所有的提交记录:

1
$ git log

显示某个用户的所有提交记录:

1
$ git log --author="username"

显示某个文件的所有修改记录:

1
$ git log -p <file>

分支

列出所有的分支:

1
$ git branch

切换分支:

1
$ git checkout <branch>

创建并切换到新分支:

1
$ git checkout -b <branch>

基于当前分支创建新分支:

1
$ git branch <new-branch>

删除本地分支:

1
$ git branch -d <branch>

合并与重置

将分支合并到当前HEAD中:

1
$ git merge <branch>

使用配置好的merge tool 解决冲突:

1
$ git mergetool

撤销

放弃工作目录下的所有修改:

1
$ git reset --hard HEAD

放弃某个文件的所有本地修改:

1
$ git checkout HEAD <file>

重置一个提交

1
$ git revert <commit>

将HEAD重置到指定的版本,并抛弃该版本之后的所有修改:

1
$ git reset --hard <commit>

将HEAD重置到上一次提交的版本,并将之后的修改标记为未添加到缓存区的修改:

1
$ git reset <commit>

将HEAD重置到上一次提交的版本,并保留未提交的本地修改:

1
$ git reset --keep <commit>

参考

Git操作手册|命令速查表


本文完